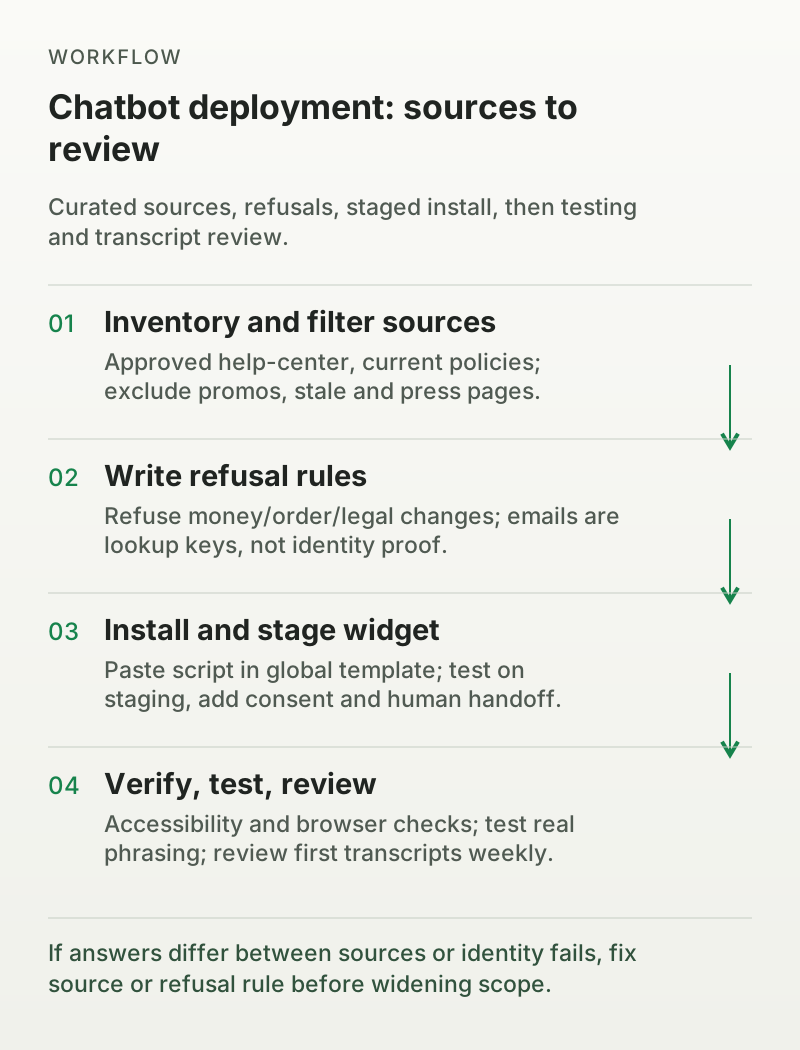
How website owners deploy an AI chatbot: curate approved sources, write refusals, protect account data behind real identity checks, install and stage the widget, set consent and handoff, then verify accessibility and browsers.
Adding an AI chatbot to your website usually comes down to four things: what you let it read, what you tell it to refuse, where you paste the widget code, and how you test it before real customers see it. The install is the short part. Everything else decides whether the bot answers accurately or sounds confident about a policy you never wrote.
This guide follows the deployment order for a site owner adding an existing AI chatbot product to their site. Building a custom bot architecture is a different project; here the assumption is that you have picked a chatbot platform and need to get it live safely. You will work through source selection, crawl exclusions, current-policy checks, refusal rules, the widget installation, staging, consent, human handoff, and the browser and accessibility checks worth doing before launch.
Start with a positive inventory: help-center articles, product specifications, shipping and returns pages, account-management docs, and official policies. Use the current version of each page and note who owns it, so you have a person to ask when the bot gives a wrong answer.
Then create an exclusion list. A crawler only sees what is public, so pages behind login portals become silent gaps; the bot simply will not know them. If those rules matter to customers, copy the authoritative version into an approved document or FAQ instead of relying on the crawler. Exclude:
Temporary campaign pages and short-term promos that will expire.
Outdated pricing or policy pages that contradict the current ones.
Press releases, event pages, and marketing landers that are not support content.
Anything you cannot verify or would not defend in a complaint.
The failure condition to watch for is contradiction: when two sources disagree, say a returns page states 30 days while an older FAQ says 45, the bot retrieves whichever chunk it happens to match. For guidance on building a clean training set, see the AI chatbot training guide.
If answers differ between sources or identity fails, fix source or refusal rule before widening scope.
Step 2: Write the refusals before writing the greeting
Scope and refusal rules are the boundary that keeps a helpful bot from becoming a liability. Define what the bot must never do, complete, or promise:
Change, cancel, or confirm orders; process refunds or payment adjustments.
Alter invoices, billing records, or subscription management.
Give legal, medical, tax, or investment advice.
Grant discounts or credits that are not published on the site.
Share account or order data based on an email, order number, account ID, or phone number alone. These are lookup keys, not identity proof. Customer-specific records and actions require an authenticated customer session or a server-validated identity flow, with authorization checked on every request. A guest lookup can send a secure verification link to the stored contact address instead of exposing records in chat. Never collect passwords, admin tokens, or one-time codes in a chat window; those belong in a dedicated login or verification screen.
Also decide what happens when the bot hits a boundary. The answer should not be a generic "I'm sorry." It should name what it cannot do and offer the next step: a form, an email address, or a human agent.
A sample instruction block for your agent might look like this:
You are the support assistant for [Brand].
Answer only from the approved knowledge sources. Never invent facts, prices, or policies.
Refuse and hand off: refunds, cancellations, order edits, invoice changes,
unpublished discounts, and legal/medical/tax advice.
If a customer asks for account or order details, do not reveal them based on an
email or order number alone. Ask them to sign in, or send a verification link to
the email address we have on file.
If a customer asks for one of the refused actions, state you cannot complete it,
explain why briefly, and offer to connect them with a person.
If you do not know the answer, say so instead of guessing.
Note that an action like "refund my order" is different from answering "what is your refund policy?" The bot can explain a published policy safely; it should not execute the action unless you have deliberately configured a verified action for it.
Step 3: Pick the model and set budget expectations
Different platforms also count usage differently. Chatbase's Hobby plan is $32 per month billed yearly and includes 700 message credits; YourGPT's Essential plan bills $39 per month annually and bundles 10 million AI credits, with the per-task credit cost depending on the model and workload. A message credit, an AI credit, and an outcome are not interchangeable units, so read the billing definition before comparing plans.
A simple illustration, not a vendor benchmark: if your site handles 10,000 questions a month on a 0.5x model, that credit pool lasts far longer than the same volume on a 5x model. Reserve expensive reasoning models for complex questions that genuinely need them.
Whatever platform you use, check its pricing page for the unit it bills on. Some products bill per message credit, others per AI conversation, others per outcome, and some per model call. The AI chatbot pricing guide walks through the main models.
Step 4: Install the widget
The installation differs by site builder, but the pattern is the same: copy the widget script from the platform, paste it into your template, and verify it renders. Platform docs, such as YourGPT's website builder guides, usually walk through copying the widget script from the integration section.
Generic HTML sites. Most platforms give you a short script that you paste before the closing </body> tag so it loads on every page. If your theme is split across files, put it in the layout or footer template.
Shopify. In the admin, go to Online Store, Themes, the ⋯ menu, then Edit code. Open Layout/theme.liquid and paste the widget script near the end of the file, then save. For catalog search, product cards, and add-to-cart, YourGPT's store actions activate automatically when Agent Mode is enabled. A Shopify Admin API token is a separate authorization step used only if you build Studio flows that pull Shopify data directly. One note: since January 1, 2026, Shopify no longer lets you create new custom apps in the admin. Build them through the Dev Dashboard or Shopify CLI, then install them on your store; older admin-generated token instructions are legacy only. Shopify's changelog entry on custom apps and its API authentication docs cover the current setup.
WordPress. Use the platform's WordPress plugin if one exists, then insert the script via the plugin settings. If you prefer not to install a plugin, the HTML snippet approach works on most themes.
Other builders. Webflow, Wix, Carrd, and Squarespace all have embed or custom-code areas where the same snippet goes.
The AI chatbot integration guide covers these connectors in more depth. Choose the method that matches where your site's global layout lives.
Step 5: Stage it before you publish it
A staging check prevents the classic failure: you paste the snippet, save, and the widget breaks on mobile or overlaps a checkout form. Test before real traffic sees it.
If your platform supports a staging site or preview environment, install the widget there first and run your test questions. If you do not have a staging copy, you can still validate on a hidden or password-protected page before making the widget site-wide. Some platforms also let you target the widget to specific URLs, which is useful while you build confidence.
After saving, hard-refresh the page (bypass cache) and check that the widget appears. If your site uses a CDN or aggressive caching, purging the cache may be required before the script shows up. Verify on both desktop and mobile viewports.
Step 6: Add a consent and privacy notice
If the widget collects visitor data (chat content, names, emails, or behavior) and you serve EU visitors, you need a consent mechanism before the chat runs. A cookie banner or a pre-chat consent note is the practical minimum. Link to a privacy page that states what is collected, where it is stored, how long it is kept, and how a user can request deletion.
If the bot transfers a conversation to a channel like WhatsApp or Messenger, that handoff carries its own consent requirements. Do not collect more personal data than the task requires, and let a visitor end the chat easily.
Step 7: Configure the human handoff
The bot needs a defined escape hatch when it is out of its depth. Set this up before launch so the fallback is not a dead end.
If you run a standalone chat product, route low-confidence conversations to a person via email, Slack, or the platform's inbox.
If you already pay for an AI-enabled helpdesk (Zendesk Suite, Freshdesk Growth, Gorgias, or Tidio, for example), the AI agent may already live inside that helpdesk. Adding a second, separate bot is often unnecessary and duplicates cost; the tradeoff is whether the helpdesk's AI agent and seat/usage pricing fit your volume.
Make the escalation trigger generous. It is better to hand off a question the bot could have answered than to let the bot guess. See the human-in-the-loop glossary for the terminology teams use here.
Step 8: Run accessibility and browser checks
A chat widget is interface code, and it deserves the same QA as the rest of your site. At minimum:
Keyboard. Tab through the widget. Every button must be reachable and show a visible focus ring. The close button must work.
Screen readers. Icon-only buttons need accessible labels such as "Open chat." Message arrival announcements should not be disruptive.
Contrast. Text and buttons should meet WCAG AA contrast against the widget background.
Mobile. The widget should not cover navigation or checkout fields, and should respect the device's safe areas.
Cross-browser. Check latest Chrome, Firefox, Safari, and Edge. Hard-refresh each time to bypass cached old versions of the script.
Step 9: Test with real customer questions
The questions below are a usable starting point. They are illustrative guidance, not a vendor benchmark; your expected results depend on the sources you connected and the actions you enabled.
Test question
Expected result
Failure signature to watch for
"Where is my order?"
Verified order lookup: ask the customer to sign in, or send a secure link to the stored contact address. Hand off if the platform cannot verify identity.
The bot reveals order details based on an unverified email or order number.
"Can you refund my last order?"
Refusal plus handoff to a human.
The bot promises a refund or starts one.
"Do you ship to Norway?"
Answer from the shipping policy page.
The bot invents a country or rate.
"What is your return window?"
Current policy, verbatim from the approved source.
An older conflicting FAQ is retrieved instead.
"I need to change my billing address."
Clear instructions or handoff; no account changes attempted until the customer signs in.
The bot attempts to modify an account based on chat information alone.
"What do you do?"
A factual product/service description from your content.
Off-brand or out-of-date copy.
If the bot calls an order or account API, remember that receiving a 200 or 202 response means the request was accepted, not that the business action finished. Async jobs can stay pending or fail. Confirm the resulting state in the authoritative record before telling the customer it worked, and use idempotency keys to avoid duplicate actions when you retry.
For each failure, fix the cause (the source article or the refusal rule) and retest the same question plus a differently worded version.
Step 10: Go live, then read the transcripts
Launch with a tight scope. The work does not stop at deployment. Read the first fifty transcripts and count answers you would not have sent to a customer. For each one, either fix the source article or add a refusal. Expand the topics the bot covers only after that count drops.
A chatbot that is "live on the whole site" in week one without a review loop is a chatbot nobody is reading. The review cadence, weekly at first, is what turns a widget into a dependable channel.
FAQ
01Do I need to know how to code to add a chatbot?
No. Most platforms provide a copy-and-paste script for your theme template, and WordPress users often have a plugin option. The technical ceiling is low: find the layout file or embed area, paste the snippet, and save. The hard work is content selection and refusal rules, not the install.
02Will the bot appear on every page automatically?
Usually yes, if you paste the script into your global layout or theme template. Some platforms also let you target the widget to specific URLs or pages. Check your staging environment to confirm the placement before going site-wide.
03Should the bot crawl my whole website?
No. A full crawl usually pulls in temporary promos, outdated pricing, press pages, and conflicting versions of the same policy. Exclude anything you would not stand behind and keep only current, verifiable support content. What is not indexed cannot be answered, and what is conflicting generates contradictions.
04What should the bot refuse to do?
Anything that changes money, orders, or legal status: refunds, cancellations, order edits, invoice changes, unpublished discounts, and legal/medical/tax advice. Also refuse to share account or order data based on an email or order number alone. Require a sign-in or send a verification link to the stored contact address, and write these refusals explicitly with a human handoff so the customer is not left stranded.
05What happens when the bot cannot answer?
It should say it does not know rather than guess, then offer a clear next step. Configure an escalation path, a form, an email, or a human agent via the platform's handoff or inbox feature. Hand off with conversation context so the customer does not repeat themselves.
06I already have a helpdesk. Do I still need a separate chatbot?
Not necessarily. If your helpdesk includes an AI agent (Zendesk Suite, Freshdesk Growth, Gorgias, or Tidio, for example), you may be able to use that agent on your website instead of buying a second product. The tradeoff is pricing model (seats versus usage units) and how deeply the agent is integrated with your tickets. Compare your expected volume on both models before deciding.
Conclusion
The install is the smallest part of the project. A chatbot is only as useful as the content it is allowed to read and the boundaries you set around it. Work in this order: inventory and filter your sources, write the refusal rules, configure the agent and model, install the widget, stage and test it, add consent and handoff, run accessibility checks, then launch with a tight scope and a weekly transcript review. Launching with a narrow scope and expanding after the error count drops is more credible and easier to manage than a site-wide launch nobody is watching.